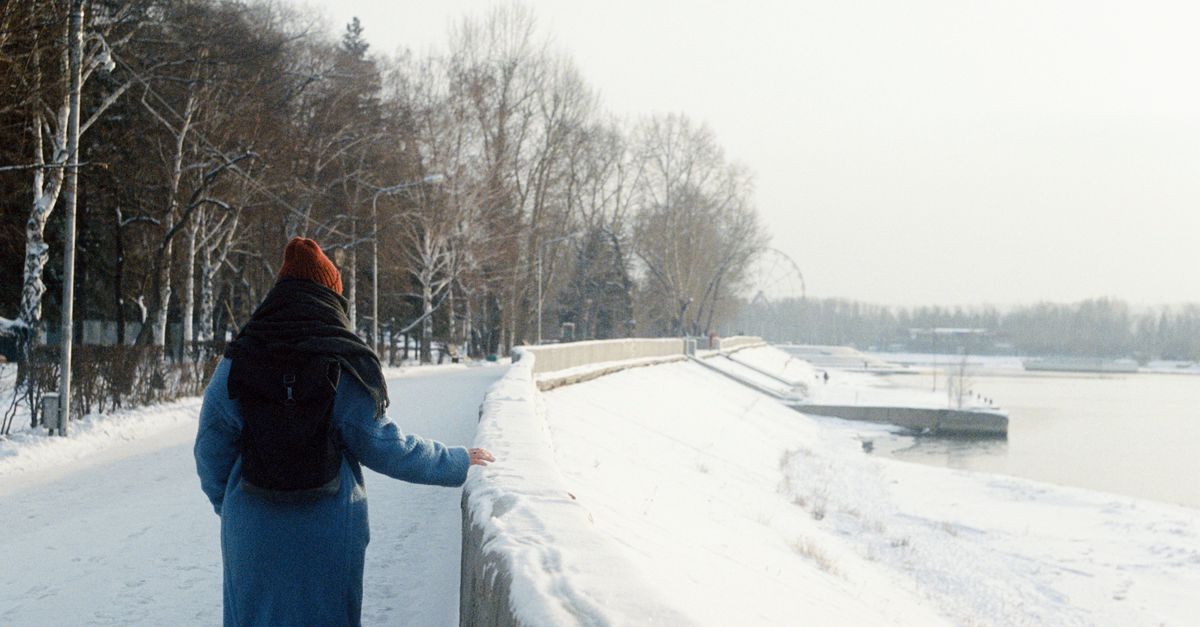
A Beginner's Guide to Packing for Cold Weather Travel
The crisp bite of winter air, the promise of snow-dusted landscapes, the cozy charm of a fireside evening – cold weather travel offers some of the most memorable experiences. But if you’ve ever found yourself shivering in a charming European city or struggling to zip up an overstuffed suitcase after a mountain getaway, you know the challenge: how do you pack enough to stay warm without bringing your entire wardrobe? The mistake I see most often, especially with first-time cold-weather adventurers, isn’t forgetting a single item, but rather a fundamental misunderstanding of how cold-weather clothing actually works together.
I learned this the hard way on a trip to Iceland in January. I’d packed what I thought were warm sweaters and a heavy coat, only to discover that ‘heavy’ doesn’t always equal ‘warm’ when it’s actively snowing and the wind is howling off the Atlantic. What changed everything for me was realizing that it’s not about the individual bulk of each item, but the strategic interplay of layers, materials, and intelligent packing techniques. You don’t need to sacrifice style or comfort, nor do you need to pay extra for overweight luggage. You just need a system.
Key Takeaways
- Prioritize a three-layer system: base for moisture, mid for insulation, outer for weather protection.
- Invest in merino wool or synthetic base layers for effective moisture-wicking and warmth.
- Utilize compressible packing cubes and the roll method to maximize suitcase space efficiently.
- Plan outfits with versatile, interchangeable pieces to reduce the total number of items needed.
Rethink ‘Warm Clothes’ with the Three-Layer System
When most people think of packing for cold weather, they picture a single, bulky coat and a few thick sweaters. This approach is fundamentally flawed and will leave you either freezing or sweating, with no in-between. The secret to staying comfortably warm in varying cold conditions, from a mild autumn chill to a blizzard, is the three-layer system. This isn’t just a suggestion; it’s a non-negotiable principle that every seasoned cold-weather traveler understands.
1. The Base Layer: Your Second Skin
This is the layer that sits directly against your skin, and its primary job is to manage moisture. When you exert yourself, even in cold weather, you sweat. If that sweat stays on your skin, it rapidly cools and makes you feel much colder. Cotton is the absolute enemy here; it absorbs moisture and stays wet. In my experience, choosing the right base layer is the single most important decision for cold-weather comfort.
- What to look for: Merino wool or synthetic fabrics (polyester, polypropylene). Merino wool is my personal favorite – it’s incredibly soft, naturally odor-resistant, and surprisingly warm even when damp. Synthetics are excellent too, often quicker-drying and more durable, but can sometimes hold odors more readily.
- Quantity: I typically pack two long-sleeve tops and two pairs of long underwear bottoms for a week-long trip. This allows me to wear one set for a couple of days while the other airs out or is washed if absolutely necessary.
- Weight: Base layers come in different weights (lightweight, midweight, heavy). Midweight is a great all-rounder for most cold trips. If you anticipate extreme cold, consider a heavy base layer.
2. The Mid Layer: Insulation is Key
This layer goes over your base layer and is responsible for trapping warm air close to your body. This is where your actual ‘warmth’ comes from. Unlike base layers, mid layers can vary greatly depending on the activity and expected temperature.
- What to look for: Fleece jackets (ranging from lightweight to thick), down or synthetic insulated vests or jackets, or even a thick wool sweater. For versatility, I always bring a mid-weight fleece jacket. It’s light, dries quickly, and can be worn on its own in milder conditions.
- Versatility: A zip-up fleece is ideal because it allows for easy ventilation. A down vest is also fantastic as it adds core warmth without restricting arm movement, perfect for active days.
- Quantity: One or two versatile mid-layers are usually sufficient. A lighter fleece and a slightly heavier option (like a thinner down jacket) give you maximum flexibility.
3. The Outer Layer: Your Weather Shield
This is your protective shell against wind, rain, and snow. Its main functions are to be waterproof, windproof, and breathable. It’s often not about warmth itself, but about preventing the elements from stripping away the warmth your inner layers have created.
- What to look for: A waterproof and windproof jacket (often referred to as a ‘hardshell’ or ‘softshell’). Look for Gore-Tex or similar proprietary waterproof-breathable membranes. A softshell offers more flexibility and breathability but is less waterproof. For general cold-weather travel, a hardshell is safer.
- Features: A good hood is essential, as are adjustable cuffs and a hem to seal out drafts. Pit zips are a bonus for ventilation.
- My recommendation: A quality waterproof-breathable shell that’s large enough to comfortably fit over your base and mid-layers. If you’re going somewhere truly frigid, a heavier insulated parka that is also waterproof would replace this, combining the outer and a substantial mid-layer into one piece.
By building your outfits with these three distinct layers, you gain incredible adaptability. Feeling too warm? Shed a mid-layer. Wind picking up? Zip up your shell. Each layer works in harmony to keep your body at an optimal temperature, making your experience far more enjoyable than relying on a single, cumbersome coat.
Strategic Material Choices: Beyond Just Cotton
As I touched on with base layers, the material of your clothing makes a colossal difference in cold environments. Cotton, while comfortable in warm weather, is a thermal liability in the cold. It absorbs moisture and loses almost all its insulating properties when wet. This is why you often hear the adage, “Cotton kills” in outdoor circles. To truly master cold-weather packing, you need to be intentional about your fabric choices.
Merino Wool: I cannot overstate the benefits of merino. It’s my go-to for base layers and even some mid-layers. It’s naturally antimicrobial (meaning it resists odor, so you can wear it multiple times without needing a wash), regulates temperature efficiently (keeping you warm when it’s cold and surprisingly cool when it’s mild), and feels much softer against the skin than traditional wool. It’s an investment, but it lasts and performs exceptionally well.
Synthetics (Polyester, Fleece, etc.): Modern synthetics have come a long way. They are typically cheaper than merino, highly durable, and excellent at wicking moisture. Fleece is the quintessential synthetic mid-layer, offering great warmth-to-weight ratio and quick drying. Puffy jackets filled with synthetic insulation (like Primaloft) are fantastic for mid-layers or standalone outer layers in dry cold, as they retain warmth even when wet, unlike down.
Down: For pure warmth-to-weight, down is unbeatable. A good quality down jacket (look for high ‘fill power’ numbers, e.g., 700-800) is incredibly compressible and warm. The major drawback, however, is that down loses almost all its insulating power when wet. This makes it a risk as an outer layer in rainy or very damp conditions. I typically use a lightweight down jacket as a mid-layer under a waterproof shell for maximum warmth and protection.
Avoid: Cotton in any layer below your outer shell. That means no cotton t-shirts, hoodies, or jeans if you anticipate being truly cold or active. Denim, in particular, is slow to dry and offers no thermal value when wet, becoming a significant chill factor. Save your stylish cotton items for indoor wear or milder climates.
By consciously choosing materials that wick moisture, insulate effectively, and provide weather protection, you build a wardrobe that works with the cold, rather than against it. This is a crucial distinction that separates comfortable adventurers from those perpetually battling the elements.
Optimize Space with Smart Packing Techniques
The biggest fear with cold weather packing is usually a heavy, bulging suitcase. Paradoxically, by focusing on the right layers and materials, you’ll actually end up with a lighter, more compact load. The key is to then optimize the space you have. Forget haphazardly tossing clothes in; intelligent packing isn’t just about saving space, it’s about making your travel smoother.
1. Embrace Packing Cubes: These are game-changers. Seriously. They compress your clothing, making everything fit more snugly and organized. I use different colored cubes for different types of items (e.g., one for base layers, one for mid-layers, one for accessories). This means less rummaging and more order, which is invaluable when you’re in a dimly lit hostel or hotel room.
- My system: I roll my clothes tightly before placing them in cubes. Rolling is superior to folding for two main reasons: it minimizes wrinkles and maximizes space utilization by removing air pockets.
- Compression Cubes: Some cubes have an extra zipper that compresses the contents further. These are fantastic for bulky items like a packable down jacket or a heavier fleece.
2. Wear Your Bulkiest Items on Travel Day: This is the oldest trick in the book for a reason. Your heaviest coat, your bulkiest boots, and even a thick sweater should be worn on the plane or train. This frees up significant space and weight in your luggage. When you get too warm, you can simply remove layers and place them in the overhead bin.
3. Fill Empty Spaces: Don’t let any nook or cranny go unused. Stuff socks, underwear, and smaller accessories into your shoes. Wrap delicate items (like electronics) in soft clothing. Every bit of space counts.
4. Prioritize Multi-Use Items: Can that one fleece be both your mid-layer and your casual jacket for dinner? Can your hiking pants also pass muster for a pub visit? The more versatile your items, the fewer distinct pieces you need to pack.
- Example: I always bring a pair of dark, insulated, water-resistant pants that look good enough for city exploration but perform well on a snowy hike. This eliminates the need for a separate pair of dedicated snow pants unless I’m doing serious winter sports.
5. The ‘Capsule Wardrobe’ for Cold Weather: Think about creating outfits with interchangeable pieces. Stick to a color palette (e.g., black, grey, navy, and one accent color) so all your tops, bottoms, and mid-layers can be mixed and matched. This dramatically reduces the number of garments you need to bring.
By adopting these packing strategies, you’ll be amazed at how much you can fit into a carry-on, leaving you nimble and avoiding those annoying baggage fees. It’s not about magic; it’s about methodical efficiency.
Footwear and Accessories: Don’t Skimp on the Details
Neglecting your extremities is one of the quickest ways to become miserable in cold weather. Cold feet, hands, and head can rapidly drop your core body temperature and cut your adventure short. While clothing layers are foundational, a specific focus on high-quality footwear and critical accessories will make or break your comfort.
1. Waterproof, Insulated Boots: This is non-negotiable for most cold-weather destinations. Your stylish fashion boots are probably not going to cut it in snow, slush, or icy rain. Look for:
- Waterproofing: Gore-Tex or similar waterproof membranes are essential. Your feet need to stay dry.
- Insulation: Measured in grams (e.g., 200g, 400g). For general cold travel, 200g-400g is usually sufficient. For extreme cold, you might need more.
- Traction: A good lug sole for grip on slippery surfaces. I once slipped on black ice in a pair of smooth-soled boots and vowed never again. Vibram soles are a common, reliable choice.
- Comfort: Make sure they are comfortable for walking long distances, as you’ll likely be exploring on foot.
2. Socks, Socks, Socks (Merino Wool Again!): Forget cotton socks. They’re a recipe for cold, damp feet and blisters. Invest in good quality merino wool hiking socks. They wick moisture, provide cushioning, and offer excellent insulation even if they get a little damp.
- Quantity: I typically pack one pair for every two days, plus an extra pair for emergencies. They can often be aired out and re-worn.
- Thickness: A few pairs of mid-weight and one pair of heavy-weight socks offer flexibility.
3. Gloves or Mittens: Cold hands are debilitating. Gloves offer dexterity; mittens offer more warmth. Consider bringing both if space allows, or a convertible pair.
- Waterproof outer: Essential if you expect snow or rain.
- Insulated inner: Fleece or down insulation for warmth.
- My preference: A pair of warm, waterproof gloves for most activities, and a thin pair of merino glove liners underneath for extra warmth and touch-screen compatibility.
4. Hat or Beanie: A significant amount of body heat is lost through your head. A warm hat is one of the simplest and most effective ways to stay warm. Look for wool or fleece.
5. Scarf or Neck Gaiter: Keeping your neck warm protects a major artery close to the surface, which helps regulate core temperature. A neck gaiter made of fleece or merino is versatile and less bulky than a traditional scarf.
6. Sunglasses: Even in winter, sunlight reflecting off snow can be incredibly bright and damaging to your eyes. Don’t forget them.
These seemingly small items are critical. They are the details that ensure you remain comfortable and focused on the beauty of your surroundings, rather than on your numb fingers or toes.
Packing Smart for Layering Success
Knowing what to pack is one thing; packing it effectively so you can actually use your layering system on the go is another. Efficient packing for cold weather isn’t just about fitting everything in; it’s about creating a system that allows for quick additions or removals of layers as conditions change throughout the day. This is crucial for maintaining comfort and avoiding the ‘too hot, too cold’ cycle.
1. The Daypack Strategy: Always carry a small daypack (15-25 liters) for your daily excursions. This is where you’ll stash layers you shed, water, snacks, a hat, and gloves. As the day warms up or you exert yourself, you can easily de-layer and store items without returning to your accommodation. Conversely, if the wind picks up or temperatures drop, your extra layers are right there.
- What to carry: Your outer shell (if not wearing it), a mid-layer, hat, gloves, neck gaiter, a water bottle, and any personal items. This keeps your essential warmth items readily accessible.
2. Outfit Planning by Activity: Instead of packing individual items, think in terms of outfits for specific activities. If you have a day planned for exploring a city, you’ll need one set of layers. If you’re going hiking or snowshoeing, you’ll need another. While many items will overlap (e.g., your base layers), thinking this way helps prevent overpacking ‘just in case’ items that don’t fit into any realistic scenario.
- My method: I list out my planned days and activities. For each activity, I note the ideal layers. This often reveals redundancies, allowing me to cut down. For example, my city walking boots might also work for a light snowy path, eliminating the need for separate heavy hiking boots.
3. Prioritize Quick-Drying Items: In cold weather, clothes dry slowly. If you plan on doing any laundry (even just hand-washing a base layer in the sink), quick-drying fabrics are paramount. Synthetics excel here, but lightweight merino can also dry relatively quickly.
4. Leave Room for Souvenirs (or Growth): Even with meticulous packing, I always aim to leave about 10-15% of space in my main suitcase. This accounts for items that might expand after being unpacked (like a down jacket) and leaves room for any small souvenirs or necessities you pick up along the way. Nothing is worse than having to sit on your suitcase to close it on the way home because you didn’t plan for this.
By approaching packing with these smart strategies, you’re not just organizing clothes; you’re organizing for dynamic comfort. This allows you to fully engage with your cold-weather destination, free from the distraction of being too hot, too cold, or poorly equipped.
Frequently Asked Questions
What are the best materials for cold weather base layers?
Merino wool and synthetic fabrics like polyester or polypropylene are ideal for cold weather base layers because they excel at wicking moisture away from your skin, keeping you dry and warm. Avoid cotton, which absorbs moisture and loses its insulating properties when wet.
Can I really pack light for cold weather travel?
Yes, absolutely! The key is to utilize a strategic layering system (base, mid, outer) with performance fabrics and employ efficient packing techniques like using compression packing cubes and wearing your bulkiest items on travel days. Focus on versatile pieces that can be mixed and matched.
How many pairs of shoes do I need for a cold weather trip?
For most cold weather trips, two pairs of shoes are sufficient: one pair of waterproof, insulated boots with good traction for outdoor activities and general walking, and a lighter, comfortable pair for indoor wear or milder conditions. Make sure your boots are broken in before you travel.
Should I pack jeans for cold weather travel?
It’s generally recommended to avoid packing jeans for active cold weather travel. Denim is slow to dry, loses its thermal value when wet, and can be restrictive. Opt instead for insulated, water-resistant pants, or layer leggings/long underwear under versatile hiking pants for better warmth and performance.
How do I keep my hands and head warm?
For your hands, invest in quality insulated and waterproof gloves or mittens; consider thin merino wool liners for added warmth and dexterity. For your head, a warm wool or fleece hat that covers your ears is essential, as significant body heat can be lost from the head.
Cold weather travel offers some of the most stunning and rewarding experiences, but it demands a different approach to packing than a sunny beach getaway. By adopting the three-layer system, making smart material choices, and mastering efficient packing techniques, you’ll transform your experience from a battle against the elements into a comfortable, enriching adventure. Remember, it’s not about bringing more clothes, but bringing the right clothes and knowing how to use them. So, embrace the chill, plan your layers, and go explore those beautiful, frosty landscapes. Your next unforgettable winter journey awaits, comfortably clad and perfectly prepared.
Written by Liam O'Connell
Adventure travel and detailed itinerary planning
A former cartographer, Liam specializes in uncovering hidden gems and off-the-beaten-path adventures.
You Might Also Like
A Beginner's Guide to Ethical Animal Encounters While Traveling
Learn how to engage with wildlife responsibly when traveling, avoiding common pitfalls and supporting genuine conservation efforts.

A Practical Checklist for Navigating Long Airport Layovers
Don't let long layovers ruin your trip. This checklist offers practical steps to make them productive, comfortable, and even enjoyable.

Digital Journal Versus Notebook: Capturing Your Travel Memories
Uncover whether a digital journal or a traditional notebook better preserves your travel memories. I share insights from years on the road.